
SARMICE (small sarmas) is something we make a lot at home. It is basically ground meat rolled up in leafy greens. There are different kinds of sarmas for different seasons throughout the year. The ones we make in the winter or heavier, greased up inside and out, smoked meat on top, and fermented cabbage is the leaf of choice. Here is a typical Serbian sarma recipe. The summer ones are a lot lighter, leafy greens are used, and since there is no sourness of fermented cabbage, we eat them with a little bit of sour cream or yogurt. But they all follow the same basic mechanism of making sarmas. Although a bit tedious to make, this can be a nice creative and tasty weekend activity.
INGREDIENTS:
1lb ground pork
about 20 leaves of Swiss chard
1 leek
1 shallot
5-6 garlic cloves
1 carrot
5-6 tablespoons of oil
Salt, pepper and paprika to taste
Sour cream or yogurt
1 cup rice
Swiss chard is a very productive and easy to grow cool season crop. I planted it last winter and it's been producing all through summer, which is great. If you don't have your own chard, you can get it at your local farmers market or grocery store.

First – put the rice to cook as this will take a while, especially if you're using brown rice. It doesn't have to be cooked all the way because it'll continue cooking in the rolls.
Wash the chard leaves on both sides and cut off the excess stems.

Cut up garlic, shallots and leak and sauté on medium heat.

Grate carrot and add to the pan. At this time you can add other vegetables such as zucchini or eggplant if you want to have higher vegetable content.

Add ground pork and seasoning.

Mix the meat well and break up the clumps.

While the meet is sautéing, cook the chard leaves in the pot with about 1 inch of water. You just need to soften them up to gain some flexibility to be able to roll. They are too brittle when they're fresh.

You don't have to cook them too much. When they wilt and look like this you're done:

Take the chard leaves out of water and place on a plate.

Add half cooked rice to the meet. I am using brown rice here which gives it a nice texture.

Mix well. Taste it to see if you need to add any more salt at this point. Turn off the burner, and now you're ready to roll, literally.

Preheat the oven to 450 F. Let it heat up while you roll sarmice.
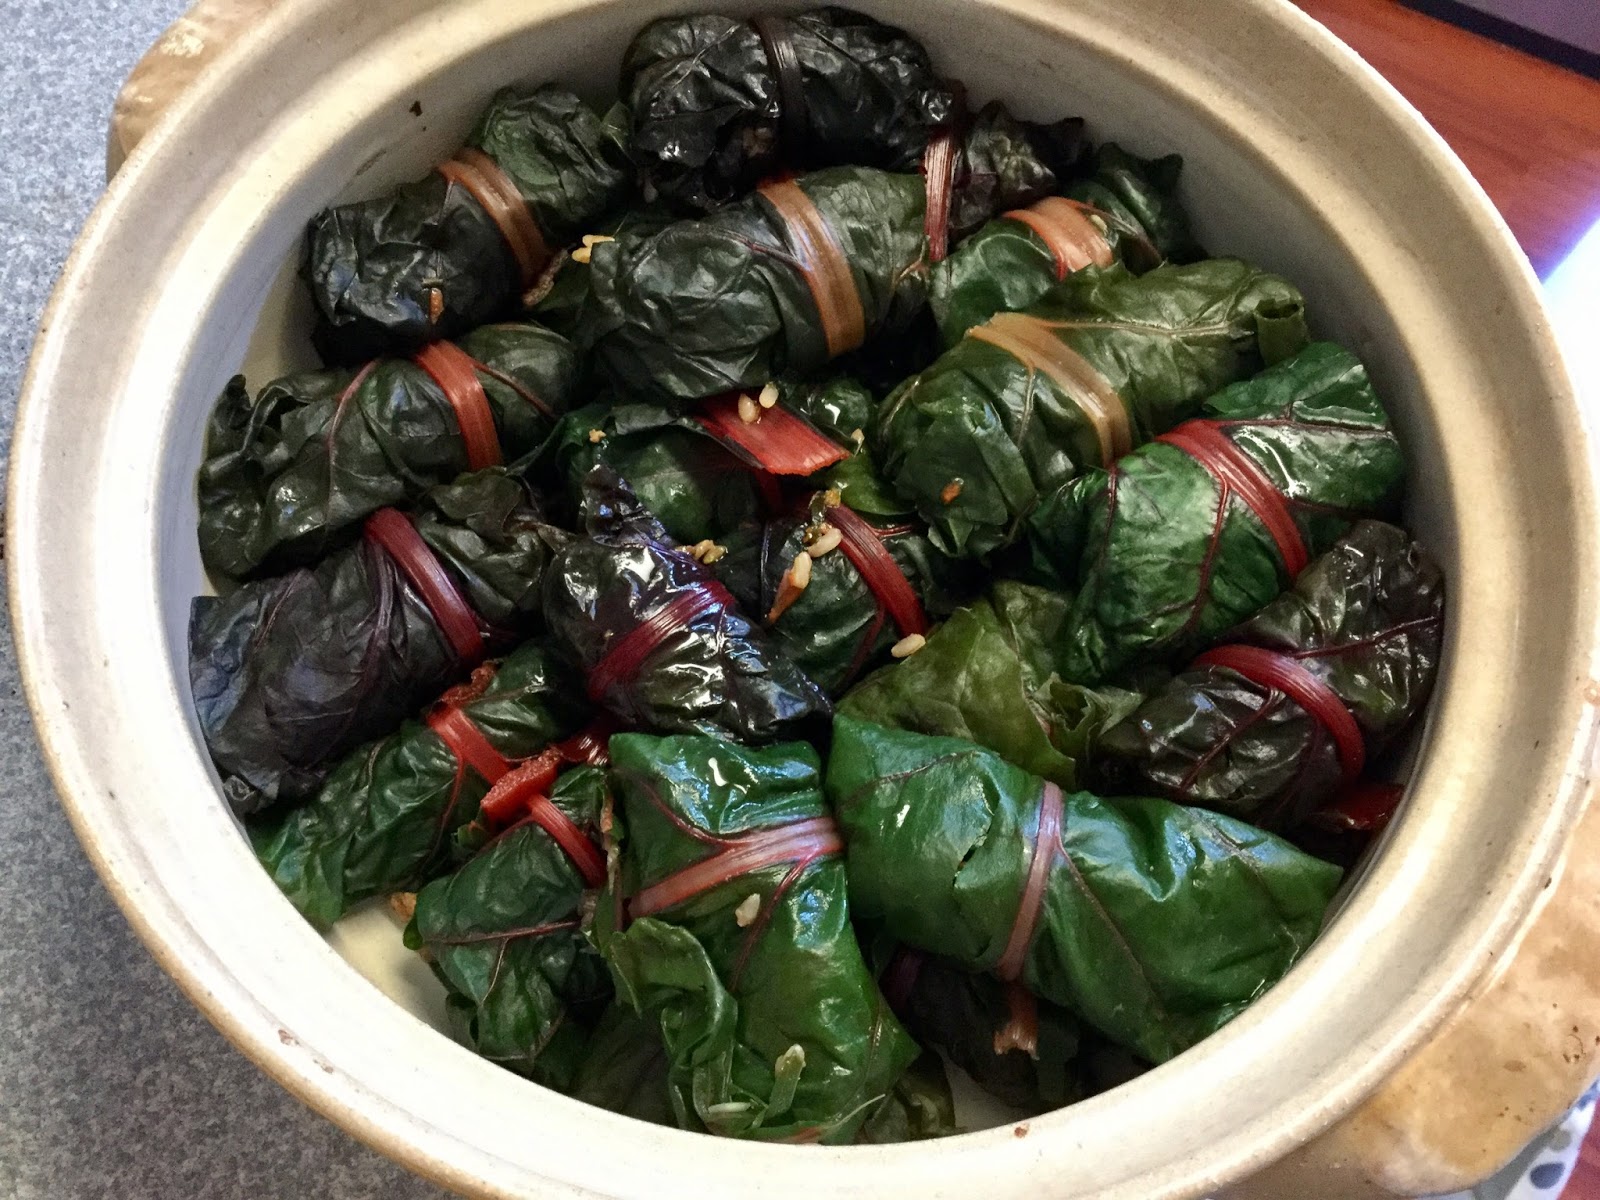
Be gentle with the leaves because they're very fragile and they can break easily. If they do break, don't worry about it they are still very usable. Depending on the size of the leaf, place one or two spoons of meat and rice mixture on the leaf and roll it up folding the sides to prevent the fill from falling out. It will take a few to perfect your rolling technique.


As you roll sarmas place them in the oven safe dish. If you have any leaves left over, cover your sarmicas with them. They will cook nice and add flavor. Whether you have left over leaves or not just depends on how much fill you put in.
Rinse the pan with a little bit a water and add it to the baking dish with sarmas. Fill enough water to almost cover them. Covered the baking dish and bake for about 30 minutes. Here I am using the oven time to bake some fresh bread as well.

Uncover the baking dish and continue baking for another 10 minutes or so to allow the water to reduce, but don't let it dry out completely. You want to keep a little bit of juice.

Carefully take sarmice out and serve (there are very fragile and after all of this work you don't want to break them now). Serve with yogurt or sour cream and bread on the side.

I posted a very similar recipe several years ago where the meat used was ground beef and leaves were collard greens. Please visit my friend Natasha's delicious creation here.


